

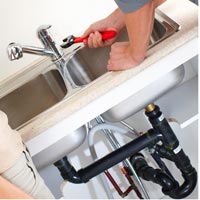
 When fixing a kitchen sink, you can experience a home improvement project that is either pretty straightforward or nightmarish. A lot is dependent on your hoses’ and valves’ overall condition.
Most people are capable of turning off the water supply valves, using some clockwise turns. However, aging valves or unused ones are subject to breakage, and may begin to leak. You should always have help nearby, ready to turn water valves controlling your New Jersey house’s supply.
Your main water valves are near your curb and under a cement lid that has a tiny hole in it. This hole allows utility people to get the lid off with a hooked rod, but using a finger is okay.
When the water is off, there is only a tiny spillage amount from leftover water and, in the case of kitchen sinks, some cooking leftovers, within your pipes and hoses. Clear the area under your sink first, put some towels down, and keep a pan at the ready.
Next, look for nuts, screw-like clamps or tintype clamps, like the ones you find in your car’s radiator. These connectors have to be undone.
Make sure your hoses and valves are in good condition and if need be, replace them. Get all your supplies and some plumbers tape.
In some instances, old valves will need cutting off with either a tiny torch or hacksaw. You may also find that these old valves have been welded on, and if so, get threaded-type replacements. However, leave plenty of piping left for re-threading. If need be, get a plumber.
Few year old hoses and valves may have a build-up of calcium carbonate. It is a chalk-like substance on shower and bathroom.
If things stick, pry them loose with some quick turns. However, be careful not to loosen or break pipes, as you may have to replace or reseal them. Both ways are not pleasant, as breaks do not always occur in accessible locations. Then, when you have taken out everything, use fine sandpaper or steel wool to clean any surfaces.
The next step is easy enough, but tricky. Cover the smooth, threaded areas where your hoses and valves with plumbers tape, a few layers will do. Most importantly, always be sure to have the tape threaded in the turning direction of the hose or valve. Tightening the tape when you screw on the hose or valve is a good idea.
Then get the valve screwed on, the hose attached and the clamps tightened, but not too tight. Everything should be snug.
Test the valve slowly, making two turns, and check for leakage. If done properly, the tape and threads will prevent leaks.
Whatever happens, do not give into frustration; just restart if the job fails and try again. Thankfully, you should not have to go through this again for at least a few years…